Installation through WordPress dashboard
Enter the WordPress dashboard (add /wp-admin to the domain name of your site in browser address line).
Step 1 -- Go to Appearance > Themes.
Step 2 -- Press “Add New” button at the top of the page, then press “Upload Theme” button.

Step 3 -- Find crane.zip archive on your computer and press “Install Now” button.
Step 4 -- Once archive with Crane is downloaded you can activate it in “Appearance > Themes”.
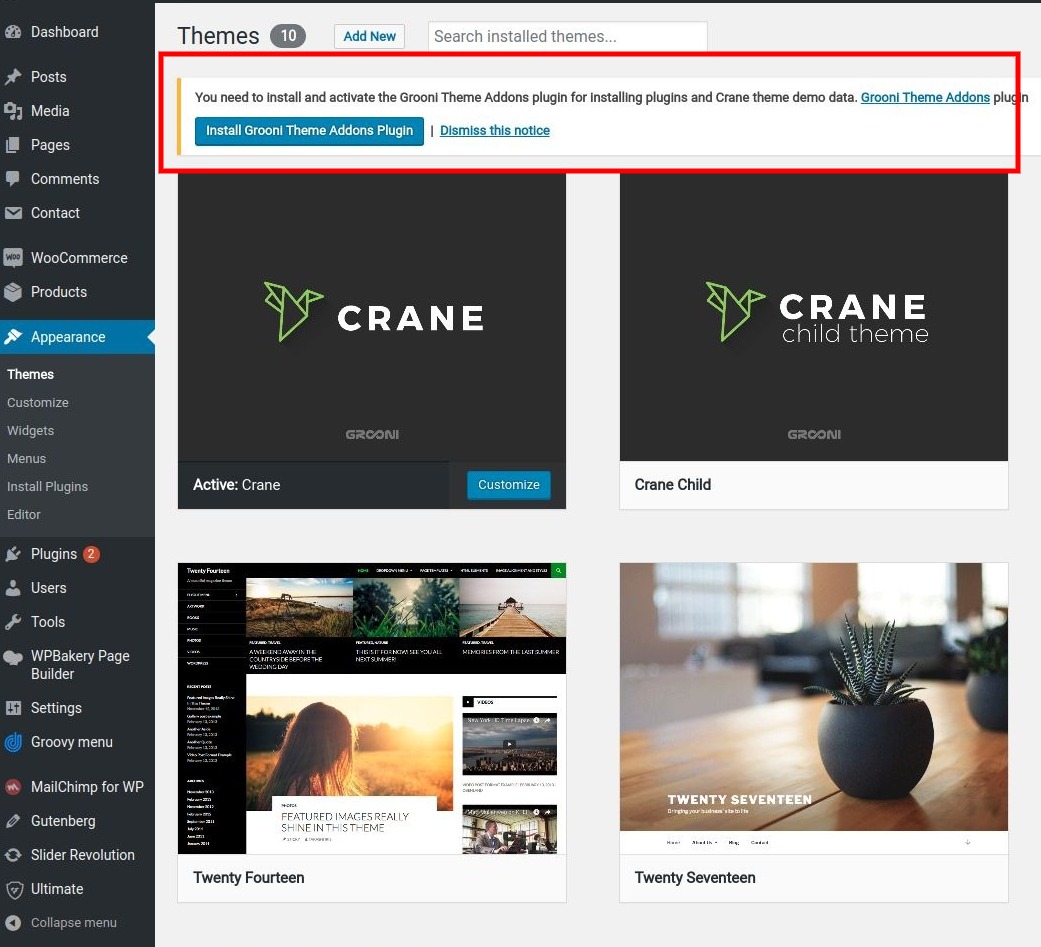
Step 5 -- After Crane installed, you need to install and activate the Grooni Theme Addons plugin. The plugin is a part of Crane ecosystem and contains all the Theme settings and additional taxonomies such as Portfolio.
Once the Crane activated you will note a notice at top of the page, that prompts to install the plugin. Click on "Install Grooni Theme Addons Plugin" button

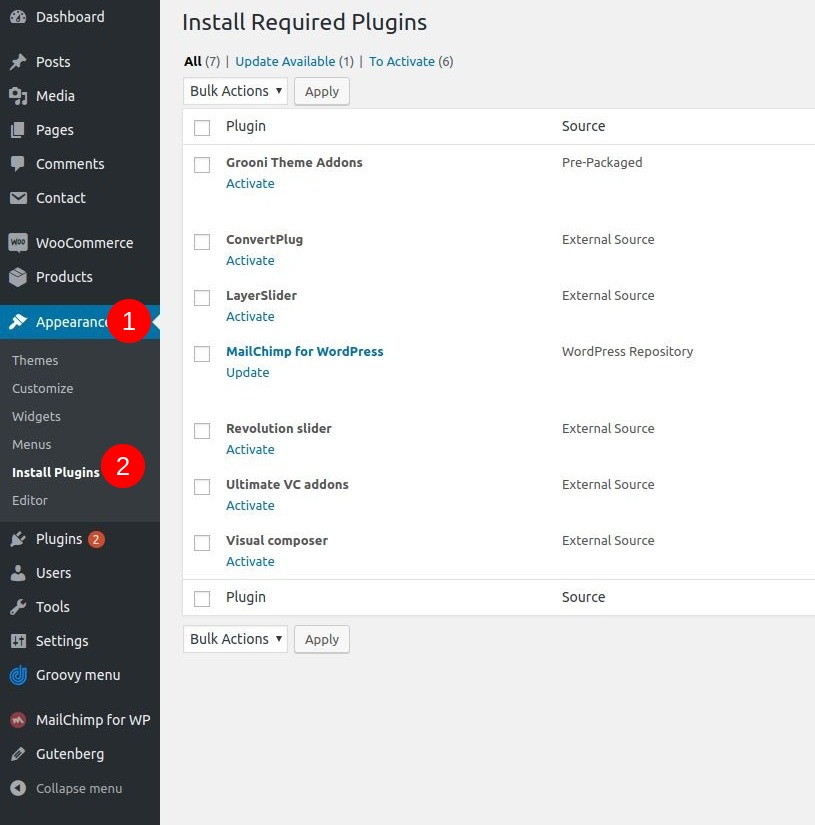
Note. If you click on "Dismiss this notice" link or accidentally delete the plugin you always can find all the plugins that come bundled with Crane in Appearance > Install Plugins

Installation through FTP
Step 1 -- Connect to your hosting through the program with FTP support (for example, with the help of FileZilla).
Step 2 -- Unpack crane.zip archive to your computer.
Step 3 -- Upload unpacked “crane” folder to wp-content/themes of your WordPress at hosting.
Step 4 -- Once the upload is completed, you can activate Crane theme in “Appearance > Themes” menu of WordPress dashboard.
hint: For advanced users, we recommend also to activate Child Theme for Crane. This will provide you with an access to advanced customization level. The example of this theme can be found in full archive of purchased WP template.

